Carbon data / 3D back to BIM
What does this feature do?
This feature allows showing the carbon emissions data in Revit / Simplebim. In Revit you can currently only display the emissions and in Simplebim this way you can visualize your LCA results in 3D. The shown emission data used are the A1-A3 values that are taken from the EPDs.
How do you use this feature with Revit?
In order to use this feature you will need to have a BIM model which you can open Revit. You will need to first upload this model, and in the mapping phase assign material choices from the database. Once the mapping is done you can login to the One Click LCA plugin in Revit you will then be able to use this feature. This workflow describes how to use the 'Carbon data back to BIM' feature in Revit. This works in all versions of Revit.Step 1: Open a model in Revit and start the One Click LCA plugin.
Step 2: Upload this model to the One Click LCA platform and map your material choices.
Step 3: In Revit, open the same model you mapped earlier.
In Revit reopen the same model of which you have previously made the mapping choices on the One Click LCA platform.
Step 4: Navigate to the One Click LCA plugin in Revit, and log in.
Use your One Click LCA username and password.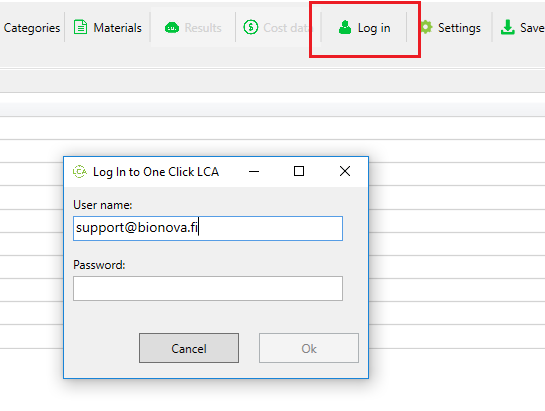 Step 4: Log in on the One Click LCA Revit Plugin
Step 5: Click on the 'Results' tab.

After clicking on the 'Results' tab you will be able to see the carbon data. You can group the results by category, material, carbon intensity and carbon impact.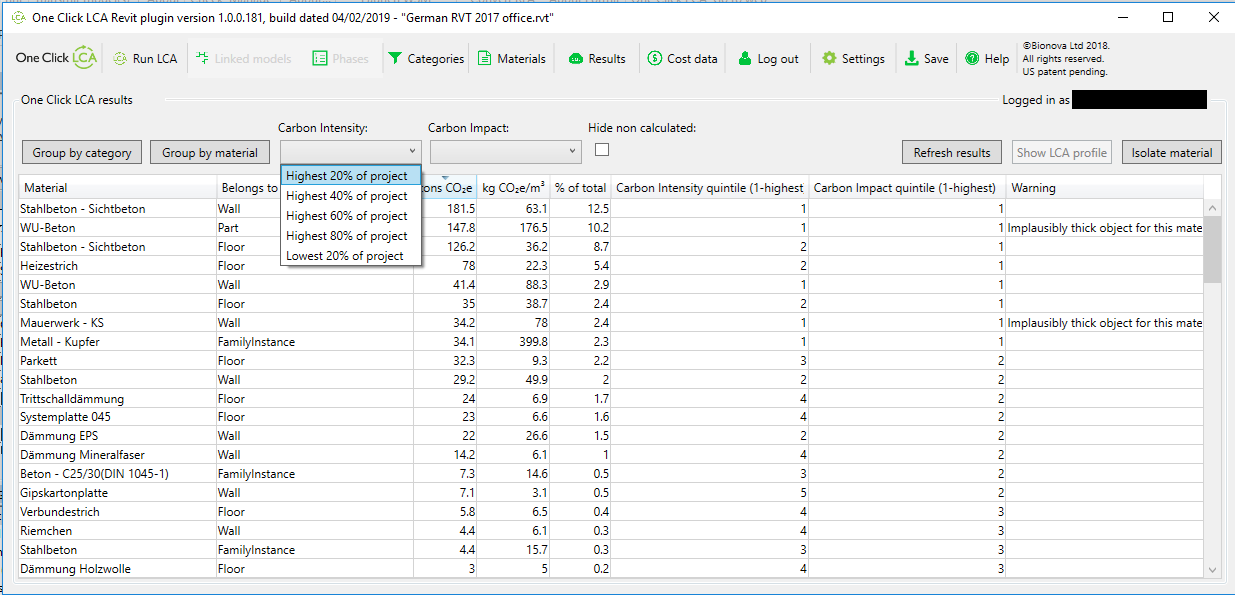 Carbon results in Revit
How do you use this feature with Simplebim?
In order to use this feature you will need to have a BIM model which you can open either in Simplebim or the BIM reader tool. You will need to first upload this model, and in the mapping phase assign material choices from the database. Once the mapping is done you can login to the One Click LCA plugin in Simplebim and you will then be able to see the results. This workflow describes how to use the 'Carbon data back to BIM' feature in Simplebim and the BIM reader tool. Only works with supported versions of Simplebim.
Step 1: Open a model in Revit and start the One Click LCA plugin.
Open a model in Revit, once you have opened the model start the One Click LCA plugin.
Step 2: Upload this model to the One Click LCA platform and map your material choices.
Once you have decided which categories and materials you want to include in your calculation, you can upload the model to the One Click LCA platform. It is important that you press 'save mappings' once done with making your material choices. For more information on how to import files from Revit, please check here: Revit Integration.
Step 3: In Revit, open the same model you mapped earlier.
In Revit reopen the same model of which you have previously made the mapping choices on the One Click LCA platform.Step 4: Navigate to the One Click LCA plugin in Revit, and log in.
Use your One Click LCA username and password.Step 5: Click on the 'Results' tab.
Click on the 'Results' tab and the plugin will now collect the required data from the One Click LCA platform. You can already do this step without uploading the model as well, as the One Click LCA platform will then check if there is already available data, however if you have very specific naming of the materials then it is recommended to upload the model first.
After clicking on the 'Results' tab you will be able to see the carbon data. You can group the results by category, material, carbon intensity and carbon impact.
How do you use this feature with Simplebim?
In order to use this feature you will need to have a BIM model which you can open either in Simplebim or the BIM reader tool. You will need to first upload this model, and in the mapping phase assign material choices from the database. Once the mapping is done you can login to the One Click LCA plugin in Simplebim and you will then be able to see the results. This workflow describes how to use the 'Carbon data back to BIM' feature in Simplebim and the BIM reader tool. Only works with supported versions of Simplebim.Step 1: First the One Click LCA plugin in Simplebim
Once you have opened Simplebim or the One Click LCA BIM tool, open the desired model.
Step 2: Upload this model to the One Click LCA platform and map your material choices.
Click on 'Calculate in One Click LCA' and upload your model to the One Click LCA platform, and make your material choices. It is important that you press 'save mappings' once done with the mapping. For more information on how to import files from Simplebim or the One Click LCA BIM reader tool, please check here: One Click LCA BIM tool & Simplebim integration
Step 3: Login to the One Click LCA plugin in Simplebim
Step 3: Login to the One Click LCA plugin in Simplebim
After you are done with the mapping on the One Click LCA platform, go back to Simplebim and click on the 'Visualize LCA results in 3D' tab. Please login with your One Click LCA username and password.
Step 4: View your results and visualize them in 3D
After you login you will immediately see the carbon data, and have the option to visualize these results in 3D. There are numerous options which you can use to visualize the results.
- Show results by highest carbon emitters, intensity or carbon calculation status
- Show results by highest carbon emitters, intensity or carbon calculation status
- Show results by carbon impact (First third, first half, 80% of total, last 20%)
- Show results by carbon intensity (Highest, second highest, second lowest, lowest)
- Show results by carbon calculation status (calculated, not calculated)
Furthermore you can also choose the option 'Opaque All' and then select individual rows (right table) to see which part in the building is responsible for the emissions.
Is this feature available to me?
This feature is available in all Expert license packages. This does require a Revit or Simplebim license. (BIM reader tool is also supported).
Related Articles
Detailed guide to BIM modelling for LCA automation
The main goal is to ensure that your BIM model contains sufficient information for LCA purposes. BIM models always contain a large amount of information about your building, however, for your LCA calculation you only need some of this information. ...Carbon Designer
View our Carbon Designer webinar here. What does this feature do? The Carbon Designer tool allows very quick baseline building creation with minimal knowledge about the project and allows optioneering choices and their impacts easily. The Carbon ...Carbon Heroes Benchmarks
What does this feature do?The Carbon Heroes Benchmark gives you an unique benchmark analysis from over a thousand buildings which have used One Click LCA to record their life cycle analysis. How do you use this feature? Preconditions: The project ...Model Checker, ensuring data quality
What does this feature do? One Click LCA automatically checks your inputs for plausibility and too generic definitions. The checking results will be shown on the mapping page. If you wish to see the exact rows that the warnings concern download the ...Features
VIDEO QUALITY: to improve resolution, start the video, open the Settings (gear icon), Quality and choose HD, or best available. Finding materials from the database In this video, you will learn how to find suitable materials and specific EPDs for ...